Learning how to replace a kitchen faucet is realistic for many homeowners, but the new fixture is often easier to install than the old one is to remove. A rusted mounting nut, a shutoff valve that still passes water, tight cabinet space, or mismatched sink holes can change a simple swap into a plumbing problem.
Before disconnecting anything, confirm that the replacement fits and that both local water valves close fully. By the end, you will know the safe replacement sequence, how to handle common removal problems, what the job may cost, and when stopping to call a plumber makes more sense.
Quick Answer
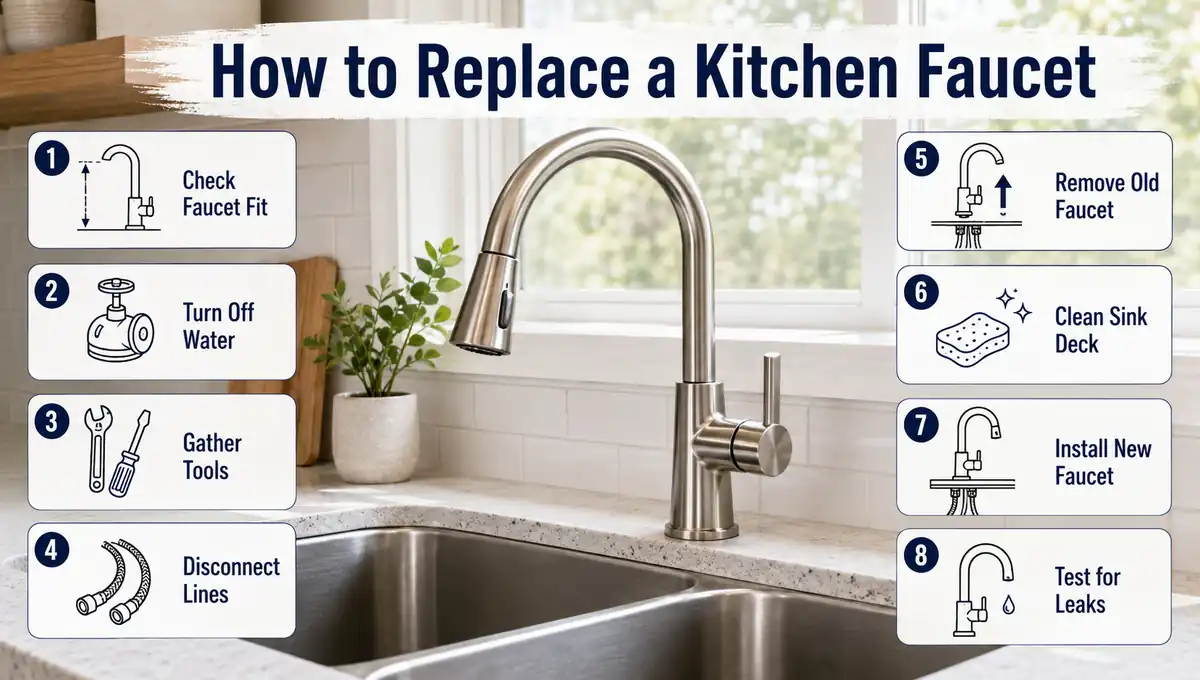
To learn how to replace a kitchen faucet, first confirm the new faucet matches your sink holes and available clearance. Shut off both water valves, relieve pressure, disconnect the supply lines, remove the mounting hardware, clean the sink deck, secure the new faucet, reconnect the lines and sprayer, then test for leaks.
- Confirm the faucet fits before removal.
- Make sure both shutoff valves work.
- Photograph the plumbing before disconnecting it.
- Follow the faucet’s own sealing instructions.
- Flush the faucet and inspect every joint.
Check That the New Faucet Fits Before Removing the Old One
A replacement faucet should match the existing sink or countertop holes without forcing unexpected drilling or plumbing changes. Check the hole count, spacing, base coverage, handle clearance, supply-line reach, and room for any pull-down hose before you disable the sink.
A deck plate, sometimes called an escutcheon plate, is the trim plate that can cover unused faucet holes. A single-hole kitchen faucet can often work on a three-hole sink when the approved deck plate covers the extra openings; a three-hole faucet needs three usable openings.
If the plumbing below the basin is unfamiliar, use an under-sink plumbing layout to identify the hot and cold lines. A kitchen sink guide can help when the sink’s hole layout is unclear.
Move the faucet handle through its full range so it will not hit the backsplash. For a pull-out or pull-down faucet, make sure the hose and weight have clear space below the sink.
Before buying, compare the faucet’s required hole size and maximum deck thickness with your sink or countertop. Thick butcher-block tops and reinforced mounting areas can leave too little threaded shank exposed below.
Also confirm that integrated supply lines reach the valves without being stretched, kinked, or joined with improvised extensions. If replacement requires drilling granite or quartz, the job is no longer a routine fixture swap.
Finished stone can crack or chip, so professional drilling is the safer option.
Tools and Materials You Actually Need
Most standard replacements need basic hand tools, good lighting, and a bucket. A basin wrench has a long shaft and pivoting jaw that reaches faucet nuts where a normal wrench may not fit.
Keep these items nearby:
- Adjustable wrench
- Basin wrench
- Screwdriver
- Flashlight
- Bucket and towels
- Replacement supply lines if needed
- Cleaning cloth
- Any specified gasket or sealant
While comparing current installation manuals, I found that sealing methods vary. Some faucets use supplied gaskets, while others call for plumber’s putty, silicone sealant, or PTFE thread-seal tape at specific locations.
Inspect the old supply lines while the cabinet is open. Replace lines that are cracked, kinked, corroded, or otherwise damaged instead of reconnecting a questionable part to a new faucet.
Do not add sealant to every threaded joint by habit. Before working around a garbage disposal or outlet, follow basic kitchen safety tips and switch off power where your hands or tools could contact powered equipment.
Eight Steps to Replace a Kitchen Faucet
The safest way to learn how to replace a kitchen faucet is to follow the work in order: isolate the water, remove the old fixture, prepare the mounting surface, install the new faucet, reconnect the plumbing, and test it. Keep the faucet instructions beside you because brackets, gaskets, hose fittings, and tightening methods vary.
1. Shut Off the Water and Relieve Pressure
Close the hot and cold shutoff valves below the sink. Turn on the old faucet to release pressure and confirm that water stops.
You usually only need the local valves for a simple replacement. If either valve keeps passing water, do not disconnect the line until you can safely isolate the supply.
Switch off power to electrical equipment in the work area.
2. Photograph and Disconnect the Supply Lines
Take a clear photo before loosening anything. It gives you a reference for the hot line, cold line, sprayer hose, and nearby plumbing.
Put a bucket below the valves. Loosen the water supply lines with an adjustable wrench and catch the trapped water.
Keep the valve body from twisting while you loosen a stubborn connector. Damaging an old valve can turn a faucet job into a supply-pipe repair.
3. Remove the Old Faucet
Find the mounting nut or bracket below the faucet base. This hardware clamps the faucet to the sink or countertop.
Use a standard wrench if you have room. If you cannot get a wrench in there, use a basin wrench.
Have someone steady the faucet from above if the whole fixture turns. Remove the mounting hardware, then lift the old faucet out.
Old sealant or mineral buildup may still hold the base down. Work it loose gently rather than prying hard against the sink.
4. Clean and Inspect the Sink Deck
Remove old sealant and mineral buildup from the exposed mounting area. Then clean the kitchen sink around the holes and dry it.
Check for cracks, severe rust, damaged laminate, or a loose mounting area before covering it with the new faucet.
5. Set the New Faucet in Place
Arrange the supplied gasket, trim ring, or deck plate as the instructions show. Feed the faucet shank, the threaded stem below the faucet body, plus the supply lines and sprayer hose through the opening.
Do you need plumber’s putty for a kitchen faucet? Only use it when the faucet or sink instructions call for it. A supplied gasket may already provide the required seal.
Center the faucet and test the handle movement before tightening from below.
6. Secure the Faucet From Below
Install the washer, bracket, or mounting nut supplied with the faucet. Start it by hand, align the faucet from above, then tighten it with the specified tool.
The faucet should sit flat without rotating during normal use. Do not overtighten; excessive force can damage the gasket, mounting hardware, or sink surface.
7. Connect the Water Lines and Sprayer
Connect the hot supply line to the hot valve and the cold line to the cold valve. Start threaded connections by hand to avoid cross-threading.
For a kitchen faucet with a sprayer or pull-out head, connect the hose as directed. A quick-connect fitting is a push-together connector that locks hose sections without a threaded nut.
Attach the pull-down weight at the specified point. Move the spray head several times to make sure the weight does not hit the drain, valves, or stored items.
That simple clearance test prevents a pull-out kitchen faucet from stopping short when it retracts.
8. Restore Water, Flush, and Check for Leaks
Open the shutoff valves slowly. Watch the valve joints, supply-line connections, sprayer fitting, faucet base, and cabinet floor as pressure returns.
Remove the aerator if the instructions call for flushing. The aerator is the small screen at the spout tip; flushing without it helps clear installation debris.
Run hot and cold water, dry each connection, wait several minutes, and check again. If pressure is low, flush first and inspect the aerator for debris before blaming the new faucet.
What to Do When the Old Faucet Will Not Cooperate
Old-faucet problems usually come down to access, corrosion, or water that will not fully shut off. Treat those as separate problems instead of applying more force and hoping the fixture comes free.
“The Mounting Nut Is Rusted and Won’t Come Off”
A corroded mounting nut often makes removal harder than installation. Start with better access and controlled force before considering cutting.
Use a basin wrench if clearance is the problem. Brush off loose corrosion, apply penetrating oil to the hardware, and give it time to work.
If the faucet spins, have someone hold it from above. Do not let hard wrenching twist the water lines or shutoff valves.
Cutting seized hardware raises the risk when the nut sits close to pipes, wiring, the sink, or the countertop. Stop if safe removal requires tools or access you do not have.
“I Can’t Get the Water to Shut Off All the Way”
A few drops of trapped water are normal, but steady flow means the shutoff valve is not isolating the faucet. Do not continue with an active water supply.
You may need to close the home’s main shutoff before a faulty local valve can be repaired. If you are not comfortable working on supply plumbing, use a plumber.
Permit and licensing rules for valve or pipe work vary by city and county. Check local requirements if the project expands beyond changing the faucet fixture.
How Hard Is It, How Long Does It Take, and What Does It Cost?
Once you understand how to replace a kitchen faucet, the main difficulty is easy to judge. A like-for-like swap is a good DIY candidate when the holes match, the valves work, and the old mounting hardware comes apart normally.
Published time figures reviewed in August 2026 vary because they measure different situations. A clean swap may take under two hours, while corrosion, poor access, or plumbing changes can stretch the work to several hours.
| Situation | What changes | DIY fit |
|---|---|---|
| Like-for-like swap | Same holes and working valves | Good DIY candidate |
| Different hole layout | Deck plate or unused holes | Often DIY without drilling |
| Plumbing or stone changes | Valves, pipes, or new holes | Professional help often makes sense |
Published August 2026 figures reviewed for this article place many DIY faucet purchases around $50 to $500 and professional replacement around $200 to $800 when labor is included. These are reference ranges, not a national average; prices vary by region, faucet choice, access, and any plumbing repair.
If the only problem is a drip, stiff handle, clogged aerator, or damaged hose, replacing the entire faucet may be unnecessary. A cartridge, aerator, O-ring, washer, or hose repair can be a cheaper alternative when the faucet body remains sound.
When Should You Stop DIY and Call a Plumber?
Call a plumber when the project stops being a fixture swap and becomes a plumbing repair. Failed shutoff valves, damaged pipes, water that cannot be isolated, hidden leaks, or pipes that must be moved are strong reasons to stop.
New holes in granite or quartz are another good stopping point. A leak that remains after accessible connections have been correctly reseated also deserves professional attention rather than repeated tightening.
If the job grows into a full kitchen sink installation, reassess the scope. Professional labor costs more than DIY, but forcing the wrong job can lead to water damage, damaged plumbing, or broken stone.
Conclusion
For most like-for-like swaps, how to replace a kitchen faucet comes down to three checks before you start: the new faucet fits, both shutoff valves work, and the old mounting hardware can be removed safely. If those checks pass, follow the replacement steps and test every connection before closing the cabinet. If the job requires drilling stone, repairing valves, moving pipes, or fighting an unexplained leak, stop and bring in a plumber rather than forcing the project.