You already know how to organize a kitchen pantry in theory. Take everything out, put it back neatly. The reason it hasn’t happened is that you don’t know how long it will take, and every guide you open tells you to buy containers before it tells you anything useful.
So here is the honest version. This page gives you realistic timings for your pantry size, the placement rule that three separate professional guides agree on, and the free route through every single step. Buy nothing until the pantry already works.
Quick Answer
Organizing a pantry takes one session, and placement does more work than products do. Empty it completely, group what you own, then put things back by height rather than by category alone.
- Expect about one hour for a single shelf and a full day for a large walk-in
- Empty it before a grocery run, when stock is lowest
- Category counts are personal — published guides use anywhere from three to seven
- Heaviest at the bottom, most-used at eye level, lightest on top
- Five of the eight steps cost nothing at all
How Long Does It Take to Organize a Pantry?
Organizing a pantry takes about one hour for a single shelf, two hours for a small closet pantry, and up to a full working day for a large walk-in. Across three published project write-ups, the times run from one hour to eight hours, and the gap is explained entirely by pantry size rather than by method.
| Pantry size | Reported time | Who did it |
|---|---|---|
| Single shelf or cabinet | About 1 hour | One person, no containers used |
| Small or closet pantry | 2 hours | Professional team |
| Reach-in pantry | Estimated 3 to 4 hours | Banded from the two figures either side |
| Large walk-in | 8 hours | Professional team, family of five |
Times published as of August 2026. The reach-in row is estimated from the range, not published.
Two things those numbers hide. Two of the three projects used professional teams, so a first-timer working alone should add time rather than match it.
The second is bigger. Reading through those published timelines, I noticed the widely quoted two-hour figure includes a step called “order products,” and the step after it opens once the products arrive. The real elapsed time is days, not two hours. Plan the shopping separately or skip it, which the section below shows you how to do.
Where to Start When You Organize a Kitchen Pantry
Start by taking every single item out. This is the one step all five published guides agree on, and it is the step most people skip because it looks like extra work. Organizing around what is already in there produces tidy clutter, not a working pantry.
Do it right before a grocery run, when stock is at its lowest. Spread everything on a counter or table so you can see the whole inventory at once. That view is usually the moment people realize they own four bags of flour.
Check dates as you go, and be honest about the half-used jars. Nut butters, jams and sauces pushed to the back are where most expired food hides, because you stopped seeing them months ago.
Wipe the shelves while they’re empty. It takes two minutes and you won’t get another clear run at it.
Sort what’s left into rough piles as you go. Don’t name the categories yet — just put like with like and see what shapes appear, because the piles that end up biggest tell you what your categories should be. This is also the moment to start rotating stock, which means putting older packages in front of newer ones so they get used first.
Group Things the Way You Shop, Not the Way Magazines Do
Group your food into categories that match how you actually shop and cook. There is no correct number. Comparing five published guides, the category counts run from three to seven, which tells you the number is personal rather than prescribed.
Think of it as a small grocery store. Breakfast in one place, baking in another, cans together, snacks together. You only need enough categories that things stop piling up randomly.
Size the categories to your real eating habits, not to an ideal version of them. If your household eats a lot of snacks and bakes twice a year, snacks get a whole shelf and baking gets a corner.
Two groupings earn their own space regardless of what you eat. Backstock — the unopened extras you bought on offer — belongs separate from what you’re currently using. So do kids’ snacks, if you want children helping themselves without dismantling a shelf.
Write your categories down before you put anything back. Deciding while holding a box of cereal is how systems get muddled.
What Goes on Which Shelf, Top to Bottom
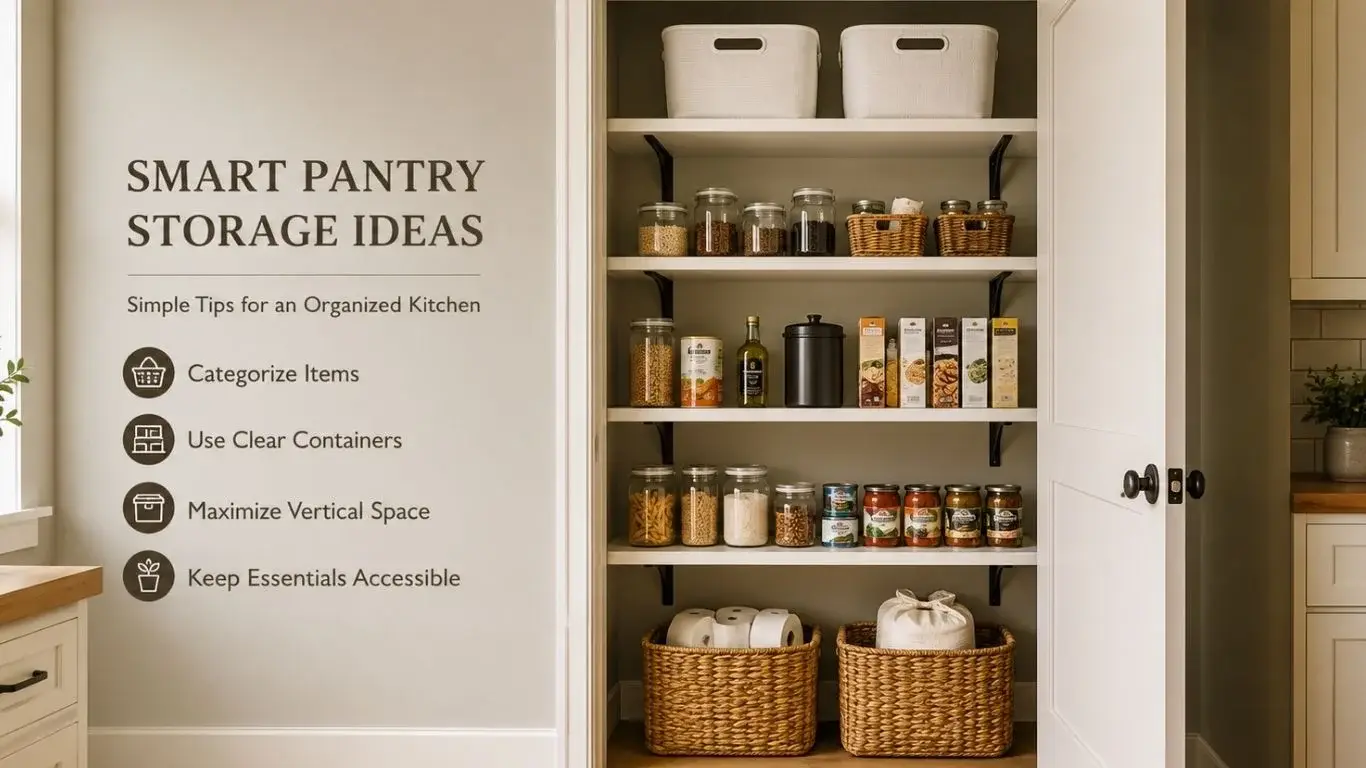
Put the heaviest items on the lowest shelves, your most-used items at eye level, and the lightest, least-used items on top. Three separate published guides state a version of this rule independently, and it holds regardless of pantry size. Figures published as of August 2026.
| Shelf level | What goes there | Why |
|---|---|---|
| Top | Light bins, occasional items, seasonal dishes | Reaching overhead with weight is how things get dropped |
| Eye level | Daily staples, coffee, cereal, cooking basics | You only use what you can see |
| Waist to mid | Cans, jars, boxed goods, everyday cooking stock | Easy reach without bending or stretching |
| Bottom | Bulk flour and sugar, small appliances, backstock | Weight low keeps the unit stable and lifting safe |
| Floor | Oversized baskets, paper goods, drinks | Nothing above head height should be heavy |
The reasoning matters more than the rule, because your pantry probably doesn’t match the photos. Eye level wins because invisibility is the actual problem — the item you can’t see is the item you buy twice. Weight goes low because a loaded tall unit gets top-heavy, and because lifting a flour sack down from shoulder height is how backs go.
One of the three guides breaks the pattern in a useful way. It puts frequently used items at waist height in base cabinets rather than at eye level, and that isn’t a contradiction — a cabinet pantry has no eye-level shelf, so waist height becomes the prime spot. Apply the principle, not the shelf number.
Deep shelves need one adjustment. Keep the front 12 inches for daily items and treat everything behind that as backstock, or the back row disappears. If your shelves are deep or fixed, the fittings that fix that sit in our guide to choosing a pantry storage cabinet.
Should You Decant, and What Should You Skip?
Decanting means moving food out of its original packaging into your own containers. It’s worth doing for staples you keep all the time, and a waste of effort for anything else. Every published guide recommends it; only one names what to skip.
Decant flour, sugar, oats, rice, pasta, granola and anything that arrives in a bulky box holding half its volume in air. Clear containers let you see the level dropping, which is the whole point. Airtight lids also keep dry goods usable longer.
Skip anything you buy occasionally, anything that already came in a good container, and anything you get through in a week. Decanting a box of cereal you’ll finish on Thursday is a chore with no payoff.
The honest catch: containers take more shelf space than the food did. One published account admits everything wouldn’t have fit back in if containers had been used. Measure your shelves before you commit.
Decanting also throws away the printed expiry date, and no guide I read solves this. Write the date on masking tape and stick it to the base of the container, or on the lid where you’ll see it from above.
That date is the whole point of the exercise. On dry goods it usually marks best quality rather than a safety cutoff, but flour, nuts and whole grains carry oils that turn rancid, and once the packaging is gone you have no way to judge how long they’ve been open. Dating takes five seconds per jar and it is the difference between a system that protects food and one that just looks tidy.
How to Organize a Pantry Without Buying Anything
You can complete this whole process for free. Emptying, checking dates, sorting, categorizing, placing by height and rotating stock all cost nothing, and they deliver most of the result. Containers are the last 20 percent, not the first step.
None of the five published guides I compared offers a no-purchase route. All five recommend buying, and one whose fourth step is “order products” concedes in a single line that decanting is optional if the budget is tight. That line is correct and buried.
Use what you already own. Shoe boxes and cut-down cardboard boxes work as bin dividers. Empty jars hold nuts, spices and baking staples. A shallow baking tray becomes a pull-out tray for small jars. Magazine holders stand foil and parchment upright.
Skip the label maker. A marker on masking tape does the same job, and it comes off cleanly when a category changes.
If you make exactly one purchase, buy a lazy susan for the corner or the deep shelf. It solves the back-row problem no free fix addresses, and it costs less than a set of matching containers.
Why Organized Pantries Fall Apart
Pantries fall apart because the system asks more of you than you’ll keep giving it. The most common failure is a container plan that doesn’t fit the food, followed by backstock creeping forward until the front row is unopened extras again.
Four failures show up repeatedly in the published accounts. Containers that don’t fit, so half the food ends up loose alongside them. Too many categories, so nothing has an obvious home. Backstock mixed with open stock, so you open the new bag first. And canned goods stacked behind each other, which one organizer names as the items her clients throw out most, because they can’t see what they have.
Maintenance costs less than a rebuild. One organizer publishes a routine of resetting weekly after the grocery run, checking dates monthly, and doing a full reassessment each season. That’s one published cadence rather than a standard, but the shape is sensible.
Add one habit to it: when you unpack groceries, put new stock behind old. That single move prevents most expired food, and it takes no extra time.
Common Questions About Pantry Organization
How do you organize a kitchen without a pantry?
Use the same logic across scattered cabinets. Assign each cabinet one category, keep daily items in the cabinet nearest your prep counter, and put backstock somewhere else entirely, like a hall closet. The height rule still applies inside each cabinet, and a freestanding unit can add pantry space without a remodel.
Is there a standard pantry zone system?
No standard system exists, despite how confidently each guide presents its own. Comparing five published methods, the step counts run from four to eight and the category counts from three to seven. What they share is the sequence — empty, sort, categorize, place by height, label — not a fixed number of zones.
How do you organize a deep pantry?
Treat the front 12 inches as your working shelf and everything behind it as storage. Put daily items in front, backstock directly behind rather than beside, and use a lazy susan or riser to bring the back row into view. Deeper than about 20 inches, hardware solves this better than habits do.
Bottom Line
Empty the pantry completely, sort what’s actually there, then put it back by height before you spend a dollar. Most of the benefit comes from those three moves, and you can do them this afternoon.
Once the system holds for a month, you’ll know exactly which containers you need. For the space itself, our kitchen pantry cabinet sizing guide and the wider kitchen pantry ideas collection cover what comes next.


One thought on “How to Organize a Kitchen Pantry: A Step-by-Step Guide That Sticks”