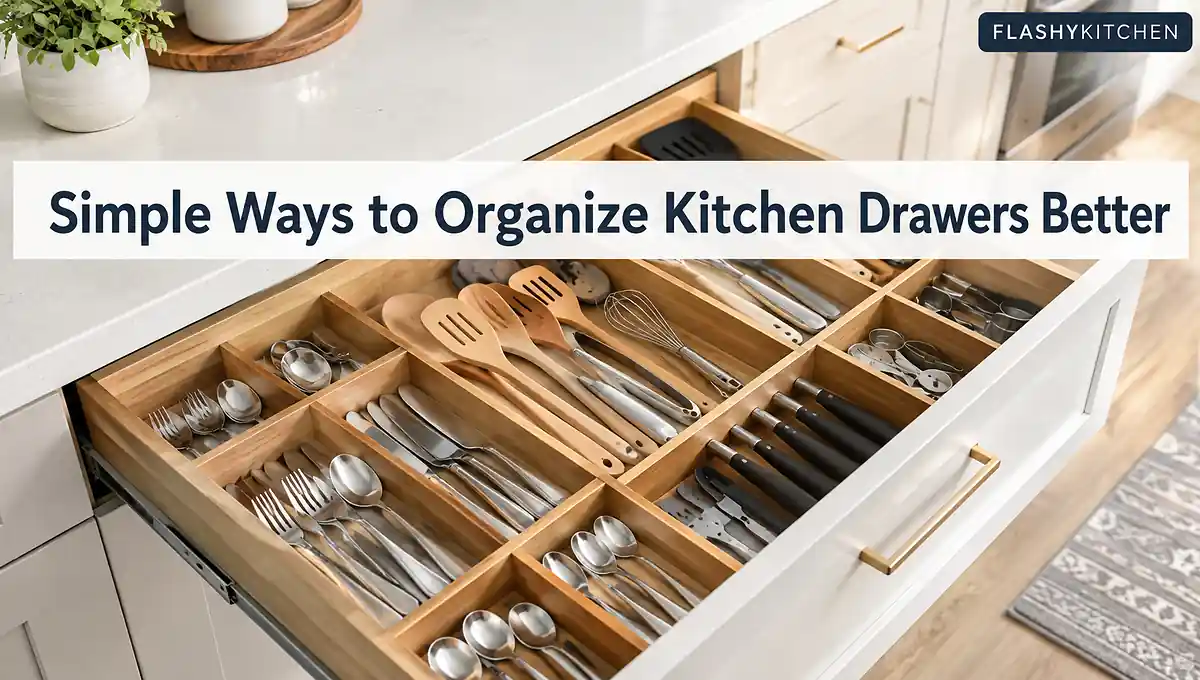
Learning how to organize kitchen drawers starts with one practical question: what deserves space in each drawer? A useful drawer should open easily, show what you need, and let you return items without moving a pile. The best system comes from matching each item to how often you use it, where you use it, its shape, the drawer’s usable size, and any safety risk.
Only then should you add trays or dividers. By the end, you should know what goes where, which organizer type fits, how to handle deep or awkward drawers, and how to keep the setup working.
Quick Answer
To learn how to organize kitchen drawers well, empty them, remove what does not belong, group similar items, and assign each drawer around your real cooking routine. Measure the usable interior before buying any kitchen drawer organizers.
- Keep daily tools in the easiest-to-reach drawers.
- Store items near the task where you use them.
- Give long utensils wider sections instead of tiny compartments.
- Use deep drawers differently from shallow ones.
- Add only enough trays or dividers to stop categories from mixing.
A simpler system is usually easier to maintain.
Reset the Drawers Before You Decide Where Anything Goes
Start by emptying every drawer you plan to reorganize. Trying to work around existing clutter often preserves a bad layout because everything stays where habit placed it.
Group items on the counter by function. Make separate groups for flatware, cooking utensils, measuring tools, baking tools, knives, food-storage pieces, towels, and true miscellaneous items.
Now remove broken tools and unnecessary duplicates. Keep duplicate spatulas or measuring spoons when you use them together, but do not give prime drawer space to gadgets you rarely touch.
Look at the size of each group before assigning space. If cooking tools cover half the counter while baking tools fit in one small pile, those categories should not receive equal drawer space.
Move food packets, backup ingredients, and snacks out of utensil storage. It is easier to organize your pantry separately than make one drawer solve two unrelated problems.
What Should Go in Each Kitchen Drawer? Use Five Questions
What should go in kitchen drawers depends on how your kitchen works. Use five questions before giving any item a permanent home: how often you use it, where you use it, what shape it is, which drawer fits it, and whether the location is safe.
Frequency decides which spots are most valuable. Everyday flatware deserves easier access than an occasional specialty gadget. Point-of-use storage means keeping an item near the task it supports, such as tongs near the range and measuring tools near the prep area.
Shape matters too. A long whisk may fit the drawer yet still catch on a tray or cross several compartments.
| Drawer situation | Best contents | Why | Avoid |
|---|---|---|---|
| Easy-access shallow drawer | Everyday flatware | Used and returned often | Bulky gadgets |
| Drawer near prep area | Peelers, measuring tools, openers | Supports food prep | Rare specialty tools |
| Drawer near range | Spatulas, tongs, ladles | Supports cooking | Loose knives |
| Deep lower drawer | Pots, lids, containers, boards | Uses extra height | Tiny loose tools |
| Narrow drawer | Clips, thermometers, small tools | Matches a small category | Long utensils |
| Miscellaneous drawer | A few unrelated essentials | Contains true odds and ends | General overflow |
Treat this table as a starting point, not a fixed map. Your dominant hand, dishwasher location, prep area, and drawer sizes can change the best answer.
If bulky cookware or serving pieces are taking space that utensils need, use broader cabinet storage ideas for those items instead of forcing every category into drawers.
The best placement passes a simple test: you can reach the item, use it, and return it without moving unrelated things.
Measure the Drawer, Then Choose the Least Organizer You Need
Measure the actual interior before choosing a kitchen drawer organizer. Record the narrowest usable width, front-to-back depth, and clear height with the drawer able to close.
The published guidance reviewed for this article consistently points back to usable interior space rather than the size of the drawer front. Drawer-box walls and slide hardware can reduce the room available inside.
Current organizer guidance also supports making a physical template when ordinary measurements are awkward. You can trace the drawer base on paper, then check the clear height separately before comparing organizers.
Before buying or building anything:
- Measure the narrowest inside width.
- Measure usable front-to-back depth.
- Check the tallest item you plan to store.
- Make sure long handles will not catch above the drawer.
- Compare the organizer’s outside dimensions with your measurements.
If a tray slides, check the fit first. A non-slip drawer liner can control minor movement, but it cannot correct a badly undersized tray.
Cost does not need to be high. Reusing small containers can cost $0. As of August 2026, one current homeowner guide lists mesh bins around $10 to $15, adjustable plastic or bamboo dividers around $15 to $30, and custom wood or acrylic inserts starting near $40 and sometimes passing $100. Prices vary by retailer, region, drawer size, and whether custom labor is included.
Which Organizer Type Fits the Problem?
Choose the least amount of structure that keeps categories separate. More compartments are not automatically better.
| Method | Best for | Main advantage | Main limitation |
|---|---|---|---|
| Fixed tray | Flatware | Fast, predictable sorting | Compartment sizes cannot change |
| Adjustable dividers | Long utensils | Keeps most drawer depth usable | Small pieces may still scatter |
| Modular bins | Mixed small items | Easy to rearrange | Bin walls take some space |
| Peg or vertical system | Deep drawers, lids, dishes | Uses height and limits shifting | Needs enough clear height |
| No organizer | Large irregular tools | Maximum usable space | Needs strict category limits |
A wooden drawer organizer can work well when its compartments match what you own. Material matters less than fit and flexibility.
This is one place where popular advice can backfire. People dealing with long utensils report that rigid organizers can consume useful depth and create compartments that do not fit their tools. Simple adjustable drawer dividers may use the available space better.
Organize Drawers Without Buying Organizers
You can answer how to organize kitchen drawers without organizers by giving each drawer fewer jobs. Let the drawer walls contain long tools, then use one small box you already own for clips, tiny gadgets, or loose measuring pieces.
DIY drawer dividers are useful for testing a layout. Cardboard drawer separators can create temporary lanes before you spend anything on permanent drawer inserts.
If the test layout keeps failing, change the categories first. Buying a nicer version of the same bad arrangement will not fix it.
Silverware, Large and Awkward Tools, and Knives Need Different Rules
Flatware, cooking tools, and knives should not share the same organization method. Their shapes are different, and knives add a safety risk that ordinary utensils do not.
Keep Flatware Predictable
A silverware drawer organizer works because forks, spoons, and table knives repeat the same basic shapes. Put everyday flatware where unloading dishes and setting the table require the least movement.
A flatware drawer organizer or cutlery organizer should match the pieces you actually own. Do not choose a large tray just because it has more compartments.
When organizing silverware, keep everyday pieces in the most accessible sections. Serving spoons and specialty pieces can use a longer shared compartment.
Different silverware organizers solve the same basic problem: keeping repeated small shapes visible and separated. Choose the format that wastes the least drawer space.
Give Long Cooking Utensils More Room
A utensil organizer should fit spatulas, ladles, tongs, whisks, peelers, and other cooking utensils without forcing them into short molded slots.
For large tools, a kitchen utensil organizer with broad lanes often works better than molded slots. An adjustable utensil drawer organizer can separate long tools from small pieces without covering the whole drawer floor.
A kitchen drawer organizer for large utensils is a poor purchase if the tray shortens usable space. One divider may work better than a full insert. A dedicated kitchen spoon organizer only makes sense when spoons form a large category.
Wooden spoons should return to enclosed storage clean and fully dry. If they are stained, rough, or holding odors, clean wooden utensils before putting them away.
Keep Knife Blades Contained
Do not leave sharp kitchen knives loose among utensils. A knife organizer, fitted in-drawer block, or protected holder should prevent blades from moving freely and reduce blind contact with an edge.
Storage does not replace edge care. If a blade has become dull, sharpen kitchen knives correctly rather than treating the organizer as a maintenance solution.
Homes with children should also consider drawer access. Basic kitchen safety tips should take priority over the most convenient placement for sharp tools.
Deep Kitchen Drawers Need a Stack, Stand, or Layer Plan
For deep drawers, decide whether the contents should stack, stand vertically, or use a shallow upper layer. A deep kitchen drawer organizer earns its space only if it improves access.
Stack items that nest cleanly and remain easy to remove. Mixing bowls, food containers, and some cookware can work this way if you do not have to unload several heavy pieces to reach one item.
Use vertical storage for flat pieces. Pot lids, cutting boards, baking sheets, and similar items are often easier to identify when they stand in divided sections.
Layer the drawer when short and tall items need the same footprint. A shallow internal tray can hold small tools above larger pieces, but only if the lower level remains easy to reach.
This stack-stand-layer test is a more useful answer to how to organize deep kitchen drawers than simply telling every homeowner to store things vertically.
If you are wondering how to organize small kitchen drawers, do the opposite. Give each shallow or narrow drawer one small category and keep everything low enough to close freely.
Deep drawers can also attract appliances just because they have room. If that crowds out cookware used every day, store kitchen appliances according to frequency, weight, and safe access instead.
If It Becomes a Pile of Things Again, Fix the System
If your drawer becomes a pile of things again within a few weeks, treat that mess as useful information. The category may be too large, the compartments may be too restrictive, or the assigned location may not match how people actually use the kitchen.
Watch for these warning signs:
- One category constantly spills into another.
- Long tools are always left diagonally across the drawer.
- People drop items beside the organizer instead of inside it.
- You move several things to reach something used every day.
- The junk drawer becomes the home for every undecided object.
A kitchen junk drawer is not automatically a mistake. To organize a junk drawer in the kitchen, give it a few broad categories and a firm space limit. During a weekly reset, return escaped items, remove trash, and note which category keeps overflowing.
That last step is central to how to keep kitchen drawers organized. If the same tool never returns to its assigned spot, change the spot instead of blaming the person using the drawer.
A complete answer to how to organize kitchen drawers must account for maintenance, because a system that only looks good on setup day has not solved the problem.
Final Recommendation
The best approach to how to organize kitchen drawers is to make placement decisions before product decisions. Remove what does not belong, group by task, assign space by frequency and point of use, and measure the real drawer interior before buying anything.
Use the least organizer needed to keep categories clear. Start with your most frustrating drawer, test the layout for several days, then apply what works to the rest of the kitchen.