
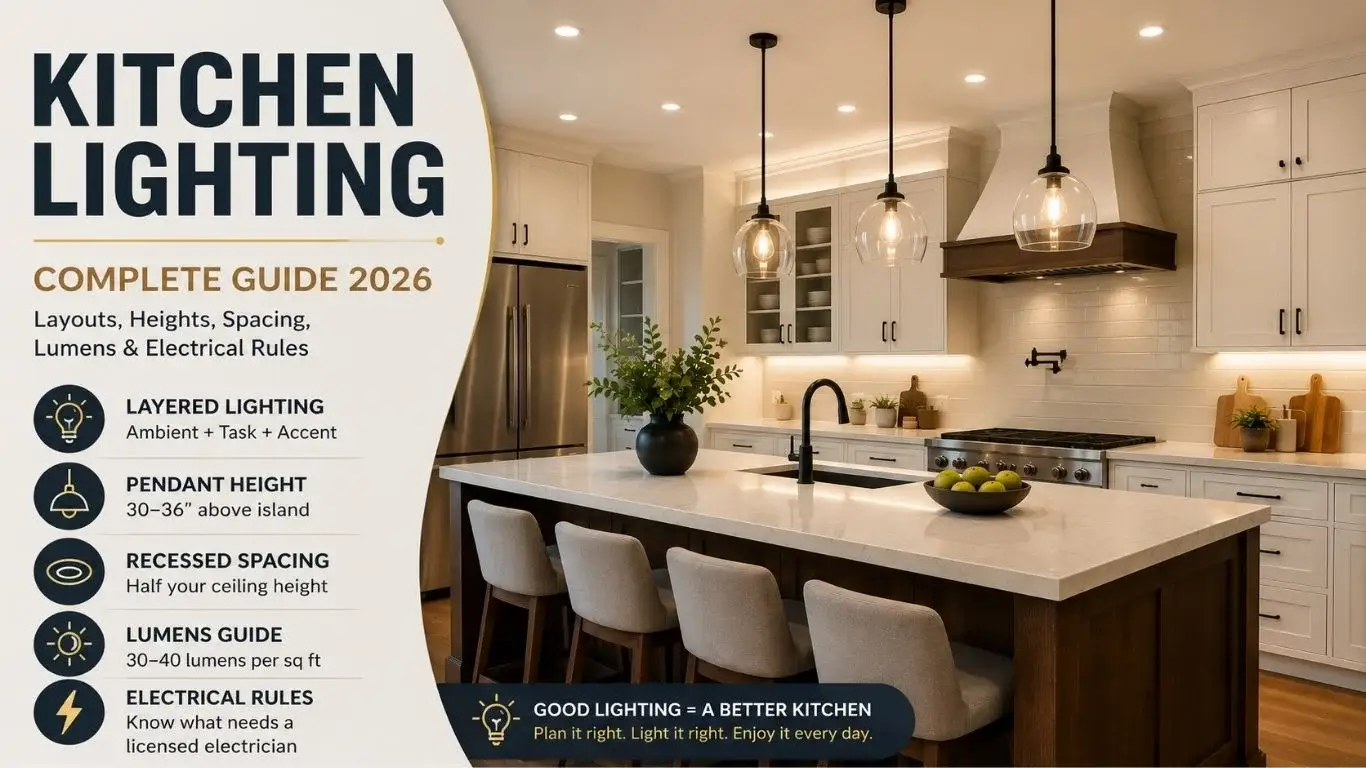
Your counter is in shadow while you chop. One corner of the room stays dim no matter what. The countertop throws glare back at you at night. Most kitchen lighting ideas you find online answer this with a photo of a nice pendant.
This page answers it with numbers. How far apart to space recessed cans, how high to hang pendants above an island, how many lumens the room needs, and which parts of the job legally need an electrician. By the end you will have a plan you could hand to a contractor.
Quick Answer
Good kitchen lighting uses three layers — ambient, task and accent — each on its own switch. Fixture count matters less than placement, and most dark-counter problems come from lights positioned behind the person working.
- Space recessed lights roughly half your ceiling height apart, in feet
- Hang pendants 30 to 36 inches above the island surface
- Target about 30 to 40 lumens per square foot for general lighting, more at work zones
- Choose 3000K for most kitchens; 4000K only where task clarity beats warmth
- New circuits and new junction boxes are licensed electrical work in most places
What Layered Kitchen Lighting Actually Means in Fixture Counts
Layered lighting means three separate systems doing three different jobs, each switched independently. A typical 200-square-foot kitchen needs roughly six to eight ambient fixtures, two to four task fixtures, and one accent run. Nearly every guide names the three layers. Very few say how many of each you need or that separate switching is what makes the system work.
Skip a layer and the kitchen fails in a predictable way. No task layer means shadowed counters. No ambient layer means bright islands floating in a dim room. No accent layer is the only omission you can live with.
Ambient: the ceiling layer
Ambient lighting fills the room evenly so you can move around safely. Recessed lights handle this in most kitchens. Flush mounts and semi-flush mounts work under low ceilings, and a single center fixture works only in a very small room.
The best lighting for a kitchen ceiling is whatever spreads output across the whole floor plan without leaving corners dark. That usually means several small sources rather than one large one.
Task: where the work happens
Task lighting puts light directly on a work surface with nothing between the bulb and the counter. Under-cabinet strips do this better than anything mounted overhead, because they sit in front of you rather than behind. Our guide to under cabinet lighting covers strip types and installation.
Sinks and ranges need their own task light. Both are places you stand and look down for long stretches.
Accent: the layer people skip
Accent lighting adds depth rather than function. Toe-kick strips, in-cabinet lights behind glass doors, and above-cabinet uplighting all fall here.
It changes how the room feels at night more than any other layer.
How Many Recessed Lights Does a Kitchen Need?
Space recessed lights apart by roughly half your ceiling height, measured in feet. An 8-foot ceiling puts them about 4 feet apart; a 10-foot ceiling puts them about 5 feet apart. A 200-square-foot kitchen with 8-foot ceilings typically lands at six to eight cans. Keep them about 2 feet off the walls.
| Ceiling height | Spacing between cans | Distance from wall |
|---|---|---|
| 8 ft | About 4 ft | 2 ft |
| 9 ft | About 4.5 ft | 2 ft |
| 10 ft | About 5 ft | 2 to 2.5 ft |
| 12 ft | About 6 ft | 2.5 to 3 ft |
The half-ceiling-height rule is a widely used trade guideline, not a published standard. [VERIFY: whether any lighting standards body publishes a recessed spacing formula for residential kitchens].
Run the math on your own room. Measure the ceiling, halve it, then divide your longest wall by that spacing to get the number of cans in each row. Round to whole fixtures and adjust so the rows land over your counters.
That last part is where most layouts go wrong. Cans get placed on an even grid centered in the room, which looks tidy on a ceiling plan and lights the middle of your floor beautifully.
Beam angle changes the math too. A narrow 25-degree beam throws a tight pool of light and needs closer spacing; a wide 60-degree beam covers more floor per fixture. Check the beam angle on the housing before you finalize spacing.
Recessed lights are also called can lights or downlights, and you will see all three terms while shopping. They describe the same fixture.
Why centering them in the room causes shadows
Lights centered in the room sit behind you when you face a counter. Your own body blocks the beam, and the shadow lands exactly where you are trying to work. This is the reason a kitchen with plenty of fixtures can still feel dark at the counter.
Move the rows forward so cans sit above the front edge of the countertop, roughly 24 to 30 inches out from the wall. Light then reaches the work surface past your shoulders rather than over them.
Two of the three retailer guides I compared mention reducing shadows as a benefit of layering. Neither explains what causes the shadow in the first place, which is why readers follow the advice and still end up chopping in the dark.
How High Should Pendants Hang Over an Island?
Hang pendants 30 to 36 inches above the island countertop, measured from the surface to the bottom of the shade. That range keeps the light on the counter, keeps the glare out of your eyes when seated, and leaves clear sightlines across the room. Add about 3 inches for every foot of ceiling above 8 feet.
Measure from the countertop, not from the ceiling. Ceiling-referenced measurements break the moment your ceiling height changes, and the number that matters is the gap between the shade and the surface you are working on. [VERIFY: whether any manufacturer installation documentation publishes a standard pendant mounting height above a work surface].
Across the three retailer and manufacturer guides reviewed in August 2026, none states a pendant hanging height at all. One notes that higher ceilings can support larger pendants, which is the closest any of them comes to a number.
Spacing between pendants runs 24 to 30 inches on center for most fixtures. Set the outer pendants in from the island ends by at least 12 inches so the run reads as centered rather than crowded.
Count comes from island length. A 6-foot island usually takes two pendants, a 7 to 8-foot island takes three, and anything over 9 feet either takes four or one linear fixture instead.
Shade shape changes the height. A wide open-bottom shade throws light down and out, so it can sit at the higher end of the range. A clear glass globe with a visible bulb needs the lower end, or the exposed filament sits right in the eyeline of anyone seated across from you.
Pendants over a table rather than an island
Over a dining table the reference point stays the same but the height drops slightly. Aim for 28 to 34 inches above the tabletop, because nobody stands and works at a table.
A single fixture over a table should be about half to two-thirds the table width. Wider than that looks heavy; narrower leaves the ends of the table dim.
How Bright Should a Kitchen Be?
A kitchen needs about 30 to 40 lumens per square foot for general lighting, rising to 70 to 80 lumens per square foot at prep counters. For a 200-square-foot kitchen that works out to roughly 6,000 to 8,000 lumens of ambient output, plus dedicated task lighting on the work surfaces.
Foot-candles are the professional unit and lumens are the consumer one. Bulb packaging lists lumens, so that is the number you can actually shop with.
| Zone | Foot-candles | Lumens per square foot |
|---|---|---|
| General room | 30 to 40 | 30 to 40 |
| Prep counters | 70 to 80 | 70 to 80 |
| Sink | 70 to 80 | 70 to 80 |
| Island seating | 30 to 40 | 30 to 40 |
| Dining area | 20 to 30 | 20 to 30 |
One foot-candle equals one lumen per square foot, so the two columns carry the same figures in different units. Illuminance targets vary between published sources; these reflect general residential guidance. [VERIFY: illuminance recommendations for residential kitchens from a named lighting standards body].
The arithmetic is simple. Multiply your kitchen’s square footage by the lumens-per-square-foot figure for that zone, then divide by the output of the fixture you are considering.
Work an example. A 200-square-foot kitchen at 35 lumens per square foot needs about 7,000 lumens. Recessed cans producing 800 lumens each would take roughly nine fixtures, which lines up with the spacing table above.
Most residential recessed fixtures produce somewhere between 600 and 1,000 lumens each, and the figure is printed on the box next to the wattage. Use the actual number for the fixture you are considering rather than the example above, because the difference between 600 and 1,000 changes your can count by roughly a third.
Finish color changes the answer more than most people expect. Dark cabinets, dark countertops and matte finishes absorb light, so the same fixture count produces a noticeably dimmer room than it would with white cabinets and a light floor. Add 20 to 30 percent output for a dark scheme.
Comparing published guidance across the retailer and manufacturer pages, only one of three publishes any illuminance figure at all, and it uses foot-candles without converting to lumens. That leaves a reader holding a bulb box with no way to connect the advice to the product.
Is 3000K or 4000K Better for a Kitchen?
Choose 3000K for most kitchens. It reads as warm white, keeps wood and food looking natural, and matches the color of the light in adjoining living spaces. Pick 4000K only if task clarity matters more to you than warmth, or if your kitchen has very cool finishes like white quartz and stainless steel.
Color temperature is measured in Kelvin, and lower numbers look warmer. 2700K is the warm yellow of an old incandescent bulb. 3000K is warm white. 4000K is neutral white and starts to feel clinical in a room with wood tones.
The split by application is real. Warmer light around 2700K to 3000K under cabinets keeps food color true, which matters when you are judging whether meat is cooked. Neutral light around 3500K to 4000K gives better contrast for reading recipes and fine knife work.
Mixing temperatures across layers is the mistake to avoid. A 3000K ceiling with 4000K under-cabinet strips produces a visible color shift at the counter edge that looks like a fault rather than a choice. Match the whole kitchen or step by no more than 500K between layers.
Color rendering index, or CRI, matters as much as color temperature and almost nobody mentions it. CRI measures how accurately a light shows color against daylight, on a scale to 100. Look for 90 or above in a kitchen, because low-CRI light makes fresh produce look grey.
Tunable white fixtures shift temperature on demand, warm in the evening and neutral during the day. They cost more and need compatible controls, and they solve a problem most kitchens do not have.
Dimmers, Switching and Why It Matters More Than the Fixtures
Put each lighting layer on its own switch and dimmer. This single decision does more for how a kitchen feels than any fixture choice, and it is the part of layered lighting that guides describe conceptually and then never explain.
Three switches is the working minimum: ceiling, under-cabinet, and pendants or accent. Without separate control you can only have everything on or everything off, which defeats the point of layering.
Dimmers change the room’s function. Full output for cooking, ceiling dimmed with pendants up for eating, accent only for late evening. One circuit cannot do that.
LED dimmer compatibility is a real failure mode. Older dimmers designed for incandescent bulbs cause LED fixtures to flicker, buzz, or refuse to dim below half. Check that the dimmer is rated for LED loads and that its minimum load matches your fixture wattage, which is often surprisingly low.
Integrated LED fixtures have the driver built in and cannot take a replacement bulb. Match the dimmer to the driver specification on the fixture, not to a bulb type.
Small Kitchens, Low Ceilings and Galley Layouts
Small kitchens and low ceilings need closer fixture spacing and shallower fixtures, not fewer lights. Under an 8-foot ceiling, skip pendants over a walkway entirely and use flush or semi-flush mounts. In a galley kitchen, run a single row of recessed lights down the center of each counter run rather than down the middle of the floor.
Low ceilings change what hangs. A pendant needs 30 inches of clearance above a counter and enough headroom above that, which an 8-foot ceiling barely provides over an island and does not provide at all over a walkway.
Semi-flush mounts drop 6 to 10 inches from the ceiling and give some of the visual presence of a pendant without the collision risk. Flush mounts sit tight to the ceiling and are the only sensible choice under 7.5 feet.
Galley kitchens have a specific problem. Centering lights in the aisle puts every fixture behind whoever is working at either counter, so both work surfaces stay shadowed. Two rows over the counters beats one row down the middle every time.
Very small kitchens can skip the ambient layer as a separate system. Under a certain size, well-placed task lighting plus one ceiling fixture covers everything, and cutting six holes in a small ceiling adds cost without adding usable light.
What You Can Install Yourself and What Needs an Electrician
Swapping a fixture on an existing junction box, the metal housing in the ceiling that the wires connect into, is straightforward DIY. Adding new recessed cans, running a new circuit, installing a new box, or changing a switch to a dimmer on an unfamiliar circuit is licensed electrical work in most US jurisdictions. Requirements vary by city and county, so confirm with your local building department before starting.
The line is roughly where new wiring begins. Replacing a pendant with a different pendant on the same box changes nothing electrically. Cutting four new holes and connecting them to a circuit changes the load on that circuit and usually triggers permit and inspection requirements.
One widely visible retailer page I read publishes step-by-step wiring instructions — kill the breaker, connect the leads, secure with wire nuts — without mentioning licensing, permits or inspection anywhere on the page. That omission is common and it is not a reason to skip the check.
Cost is the question everyone asks next, and none of the retailer or manufacturer pages reviewed publishes a figure for it. What drives it is straightforward: the number of new holes, whether the ceiling is open or closed, whether a new circuit is needed, and local electrician rates. Typical US installation costs for recessed lighting run about $100 to $300 per fixture, including materials and professional labor. A six-light installation can therefore cost roughly $600 to $1,800, with new circuits, difficult ceiling access, permits, and drywall repairs potentially adding to the total. Get two itemized quotes rather than trusting a single number from anywhere, including here.
Before you hire, ask three things: whether the quote includes the permit and inspection, whether the electrician will pull the permit or expects you to, and whether the existing circuit has capacity for the added load. A kitchen circuit already carrying appliances may not.
Recessed housings come in two types and choosing wrong is expensive. New-construction housings mount to joists before drywall goes up. Remodel housings clip into a cut hole in existing drywall. If your ceiling is closed, you need remodel cans.
IC rating matters if there is insulation above the ceiling. An IC-rated housing can sit in direct contact with insulation; a non-IC housing cannot, and installing one wrong is a fire risk.
Common Mistakes That Leave a Kitchen Dark
The most expensive kitchen lighting mistakes are layout errors, not fixture choices. Cans in the wrong place stay in the wrong place, because moving them means patching drywall and repainting a ceiling. Fixtures can be swapped in an afternoon.
- Cans centered in the room. The single most common error. Your body blocks the light and the counter sits in shadow. Move the rows over the work surfaces.
- One ceiling fixture doing everything. A single flush mount in the middle of the ceiling lights the floor and nothing else. Counters, sink and range all end up dim.
- Pendants hung too low over a traffic path. Thirty inches above an island is fine because nobody walks on the island. Thirty inches above a peninsula people walk past is a head injury waiting to happen.
- Mixed color temperatures. Warm ceiling, neutral under-cabinet. The color shift at the counter edge reads as a defect.
- The wrong dimmer. An incandescent dimmer on an LED circuit causes flicker and buzz, and people blame the fixture.
- No light at the sink. The sink is where you stand longest looking down, and it is the zone most often left to the ceiling layer alone.
- Choosing fixtures before planning the layout. Pick the plan first, then find kitchen light fixtures that fit it. Doing it the other way round is how people end up with three beautiful pendants over an island that has no ambient light at all.
Frequently Asked Questions About Kitchen Lighting Layout
What is the best lighting over a kitchen sink with a window?
A window above the sink handles daylight but leaves you shadowed at night, since ceiling light comes from behind you. Place a dedicated fixture directly above the sink, forward of your head position, or angle a recessed light toward the basin. Avoid anything that reflects off the window glass into your eyes.
How many lumens does a kitchen need in total?
Multiply your square footage by 30 to 40 lumens for the ambient layer, so a 200-square-foot kitchen needs roughly 6,000 to 8,000. Task lighting sits on top of that rather than counting toward it, because the layers cover different surfaces. Total installed output usually lands 30 to 50 percent above the ambient figure alone.
Do you need a permit to add recessed lighting?
Permit rules vary by city and county, so the only reliable answer comes from your local building department. Adding new circuits or new junction boxes commonly triggers a permit and an inspection, while swapping a fixture on an existing box usually does not. Ask whether your electrician pulls it or you do.
Bottom Line
Plan the ceiling layer around your counters before you look at a single fixture. Get the recessed rows over the work surfaces, put each layer on its own dimmer, and the room will work whatever fixtures you eventually hang.
Once the layout is set, the fun part starts, and these kitchen lighting ideas pair with any fixture style you choose.